
Auto Routing
Internal Auto Routing
For a PCB with 1000 components and 2000 pins, auto routing can be completed within 20 minutes, with a routing completion rate of no less than 90% and no more than 10 DRC errors.
Entrance:
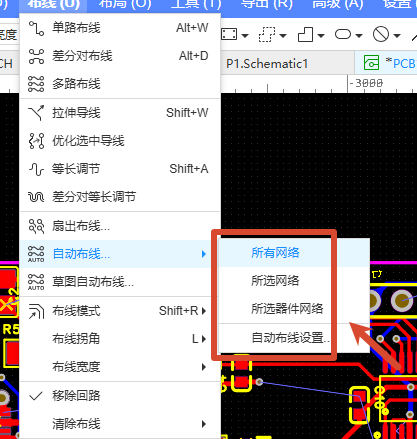
- Top Menu - Route - Auto Routing, which expands to the submenu: All Nets / Selected Nets / Selected Component Nets / Auto Routing Settings
- The first three run auto routing for the corresponding scope; Auto Routing Settings opens the settings dialog to configure routing parameters
You can set some auto-routing related parameters:
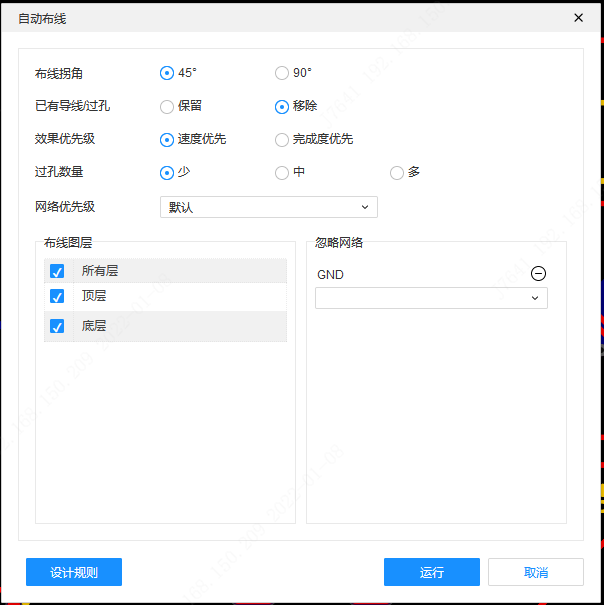
Routing Corner: 45 degrees or 90 degrees. Generally, the corners of the wiring are 45 degrees. If the board requirements are not high, it will not affect the use of 90-degree wiring.
Existing Tracks/vias: keep or remove. When starting routing, existing wires or vias can be retained or removed. Reserved by default. Selecting Remove will automatically clear all tracks or vias for routing.
Effect Priority: Speed priority or completion priority. If you want to route quickly, choose speed priority, and automatically stop within a certain trial time, and some parts may not be routed; if you are not in a hurry, you can choose completion priority, and changing the option will try to complete the wiring.
Number of Vias: Low, Medium or More. This determines the number of vias that are automatically placed. The higher the number of vias, the higher the success rate of routing. Choose according to your level of acceptance. auto routing generates vias on its own.
Net Priority: Auto-routing from beginning to end according to the set net order of the nets. Different net ordering will affect the routing success rate and the final routing effect.
- Default: The order of the PCB nets directly read by the editor program, not sorted.
- Random: Randomly generate network sorting for routing.
- User-defined network name priority: Network names that do not start with $ have priority. Sort by first letter in natural increasing order.
- Pads from most to least: Sorts nets from most to least according to the number of pads the net contains.
- Pads from few to many: Sort the nets from least to most based on the number of pads the net contains.
- Pads Farthest to Nearest: Sorts nets from farthest to nearest based on the total distance of the mutual spacing of the pads the nets contain.
- Pads Nearest to Farthest: Sorts nets from near to farthest based on the total distance of the mutual spacing of the pads that the net contains.
Route Layer: Set the layer that needs to be routed.
Ignore Network: Set the network that does not need to be automatically routed, click the drop-down list to select the network to add, and click the Remove button to remove the network. For example, GND does not require automatic wiring, and copper connection is generally performed at the end.
Design Rules: auto routing routes and places vias according to design rules. You can set the setting rules first and then perform wiring.
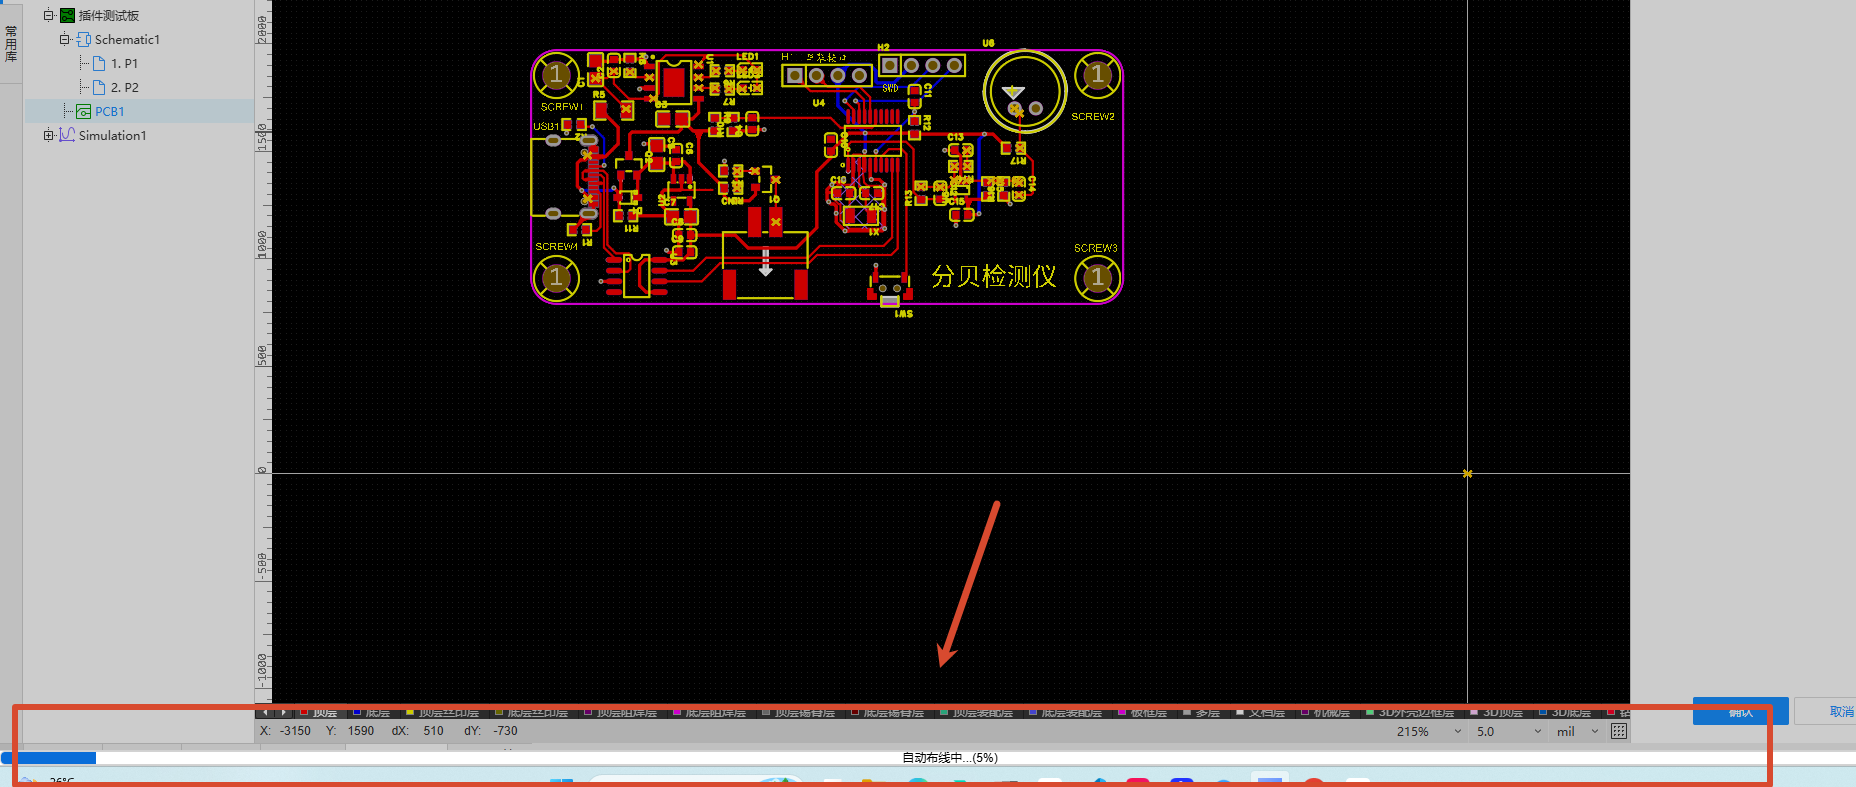
After clicking the "Run" button, automatic routing starts, and the routing process can be previewed in real time. If the over-routing angle is 45 degrees, the routing is carried out at a 90-degree corner, and it will be optimized to 45-degree routing at the end of the last surface. Stop routing during the routing process, and the completed 90-degree routing and vias will be retained, and can be manually cleared if not needed.
Iteration Settings
Auto routing supports configuring the iteration count and routing duration. When finished, the results of multiple iterations are shown for you to select and switch between, and the selected iteration can be applied to the canvas.
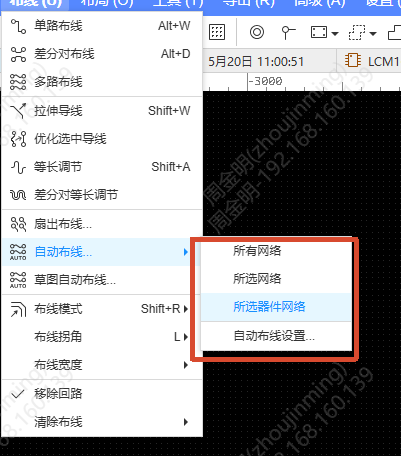
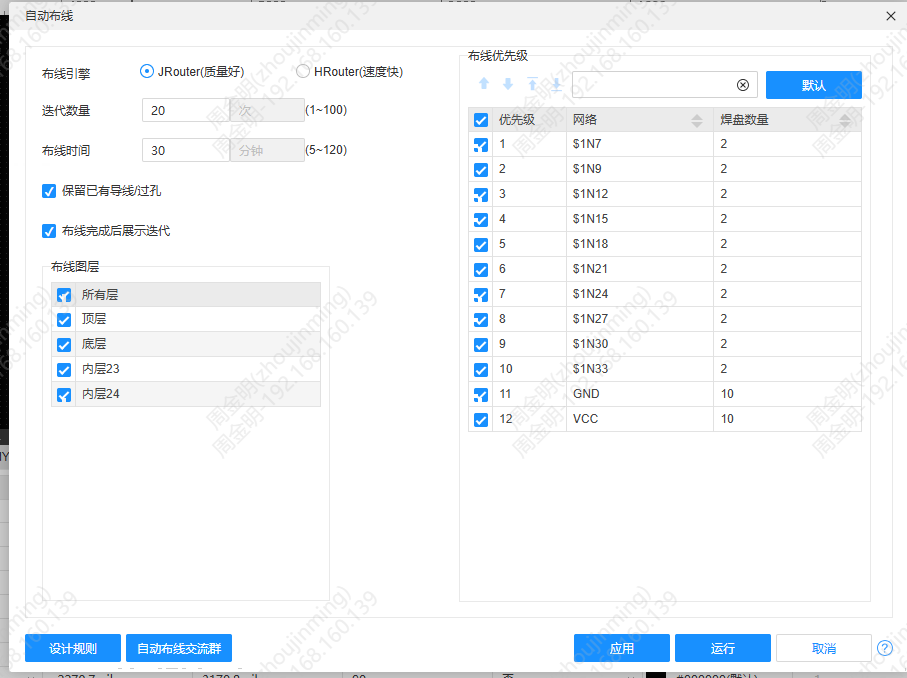
Open the Auto Routing Settings dialog to configure the following parameters:
- Routing Engine: JRouter (better quality) / HRouter (faster), JRouter by default
- Iteration Count: integer from 1 to 100, 1 by default
- Time per Iteration: 5-120, 30 by default
- Keep Existing Tracks and Vias: checked by default
- Show Iteration Results: checked by default. When checked, the iteration tab is shown after routing finishes; when unchecked, the last iteration is applied directly
- Routing Priority: uses the default priority by default; can be switched to custom, then the net priority can be adjusted manually (move up, move down, move to top, move to bottom, drag)
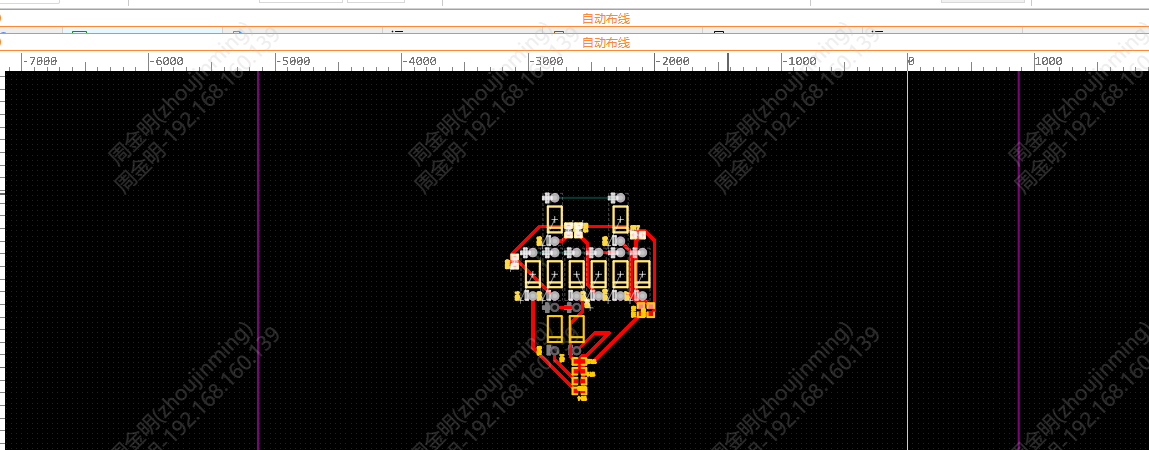
Click All Nets to run auto routing. A progress bar is shown at the bottom and the auto routing iteration tab expands on the right, updating the iteration list in real time. You can interrupt at any time.
When routing finishes, the iteration list shows the result of each iteration. Click to select an iteration, double-click to preview it on the canvas. Click Apply to update the PCB with the selected iteration. Closing the tab applies nothing and the canvas returns to its state before routing.
External Automatic Routing
If the built-in automatic router fails to satisfy the requirements of automatic routing, JLCPCB EDA supports the export of automatic routing files in DSN format and the import of automatic routing session files in SES format. You can export the automatic routing file to use a third-party automatic routing tool for routing and then import the SES file.
Operational steps:
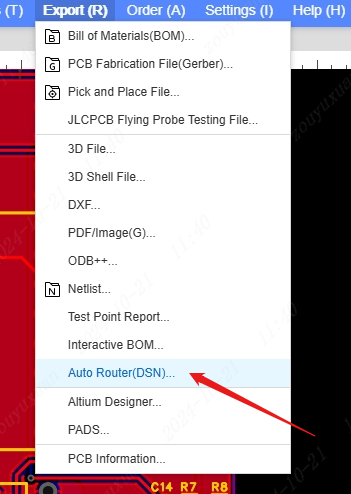
- Open the PCB and export the automatic routing file as dsn. It is advisable to remove the unnecessary vias and wires in advance.
Through: Top menu - Export - Auto Routing (DSN), or Top menu - File - Export - Auto Routing (DSN)
- Open a third-party automatic routing tool and load the automatic routing file DSN.
The third-party automatic routing tools are: Freerouting, ELECTRA, TopoR, etc.
The download address for Freerouting:
Taking Freerouting as an example:
- Open Freerouting and load the automatic routing file SES.
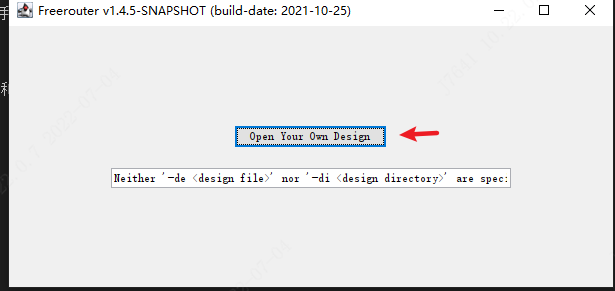
- Configure the automatic routing rules. If configuration is not necessary, you can directly click on "Route".
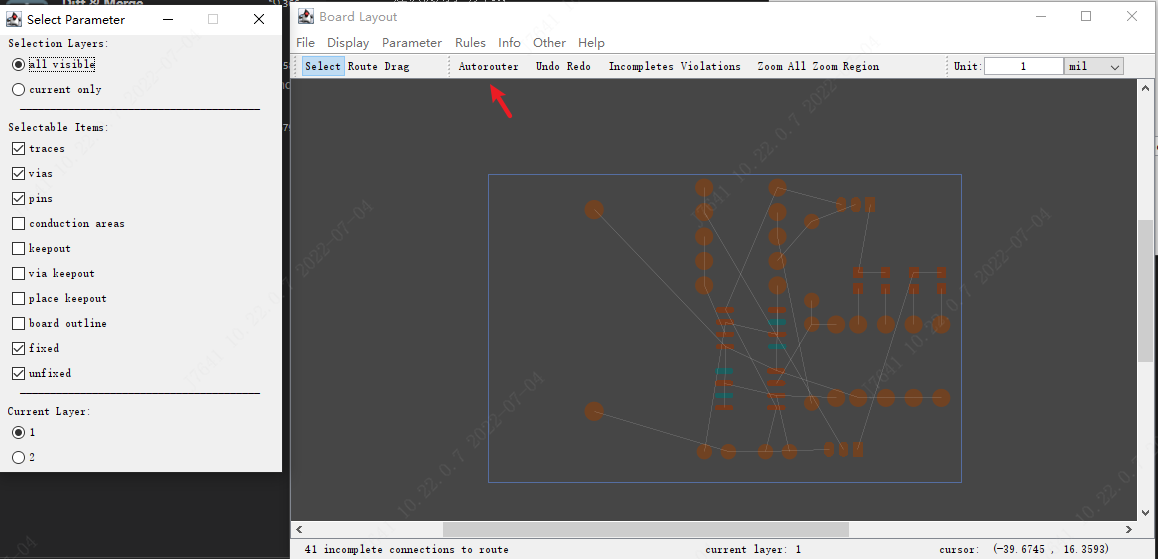
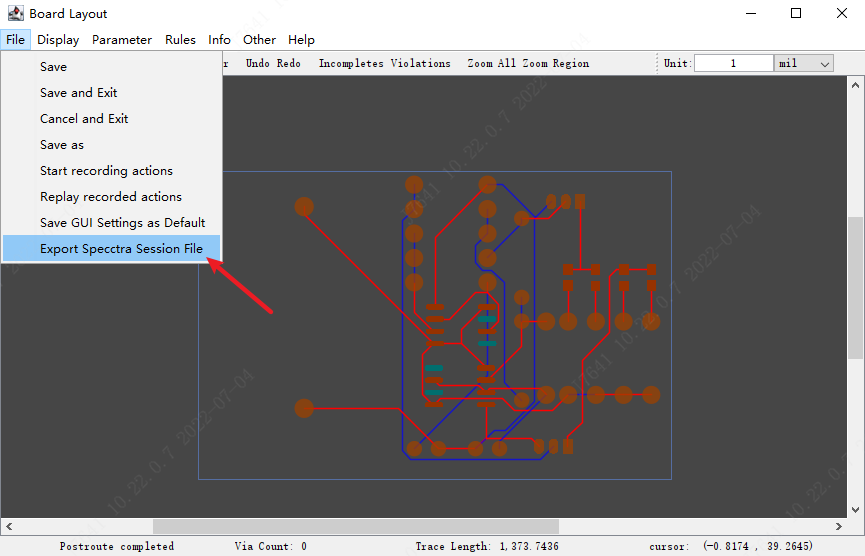
- After the completion, export the automatic routing session file ses, which will be saved in the same directory as the dsn.
- Import the automatic routing session file into the PCB to complete the import process.
Entry: Top menu - File - Import - Auto-Routing (SES).
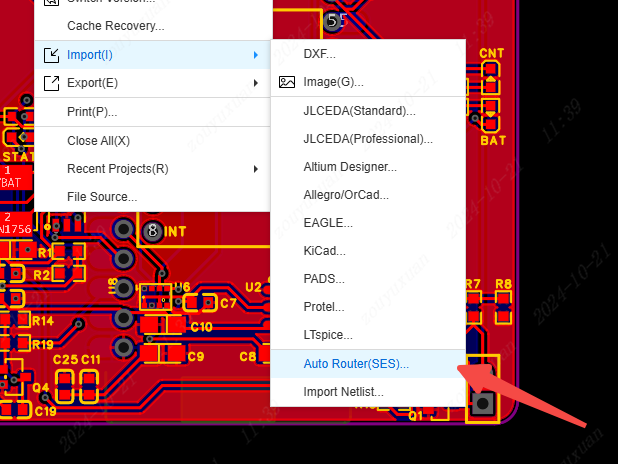
The editor will generate wires and vias automatically to accomplish the automatic routing.
Demo video: https://www.bilibili.com/video/BV1F14y1s7o6/?spm_id_from=333.999.0.0
You can also utilize the Freerouting Desktop GUI to simplify automatic routing operations: https://github.com/easyeda2021/freerouting-desktop
Of course, you can also directly install the Freerouting integration plugin in the editor for operation. The installation entry is: "Top Menu - Advanced - Extension Manager - Freerouting - Install". The plugin homepage is: https://jlcext.com/item/oshwhub-official/freerouting-intergration
Auto Routing User Group