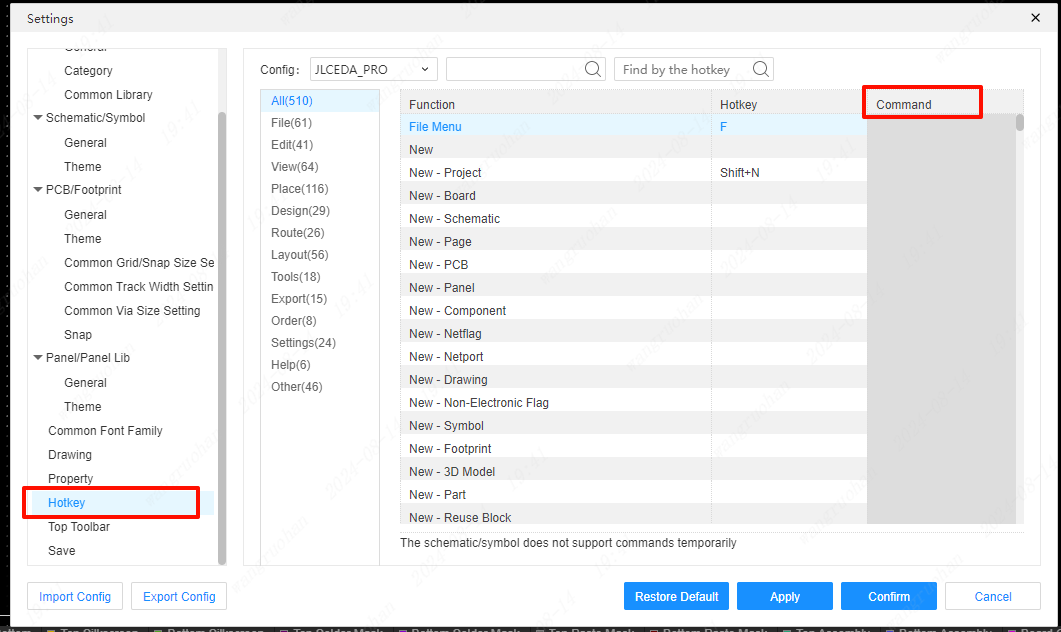
Command
EasyEDA Pro can use system commands to draw quickly. Currently, only PCB and footprint commands are supported, and schematic diagrams and symbols are temporarily not supported.
Instructions:
- Click on the top menu - Tools - Commands in the PCB interface or footprint interface
- Shortcut C
After clicking, a command input box will pop up in the lower left corner of the interface.

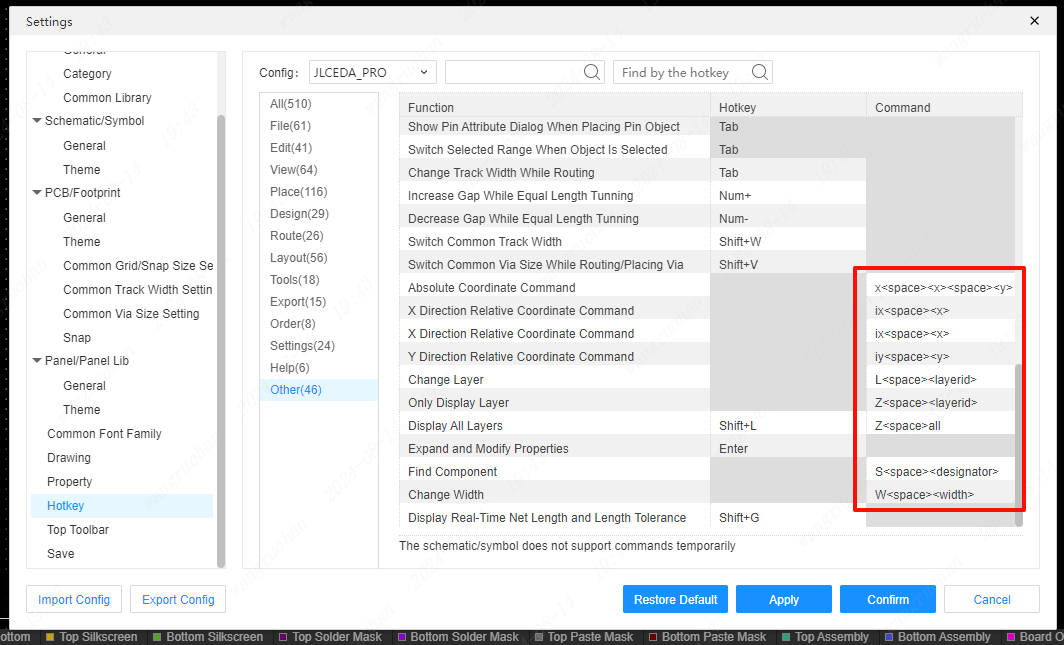
X-direction relative coordinate command ix <space> <x>
Click on the wire, click on the top menu - Tools - Commands to call up the command input box, and enter IX 300 in the named input box (note that ix must be separated by a space to enter coordinates)
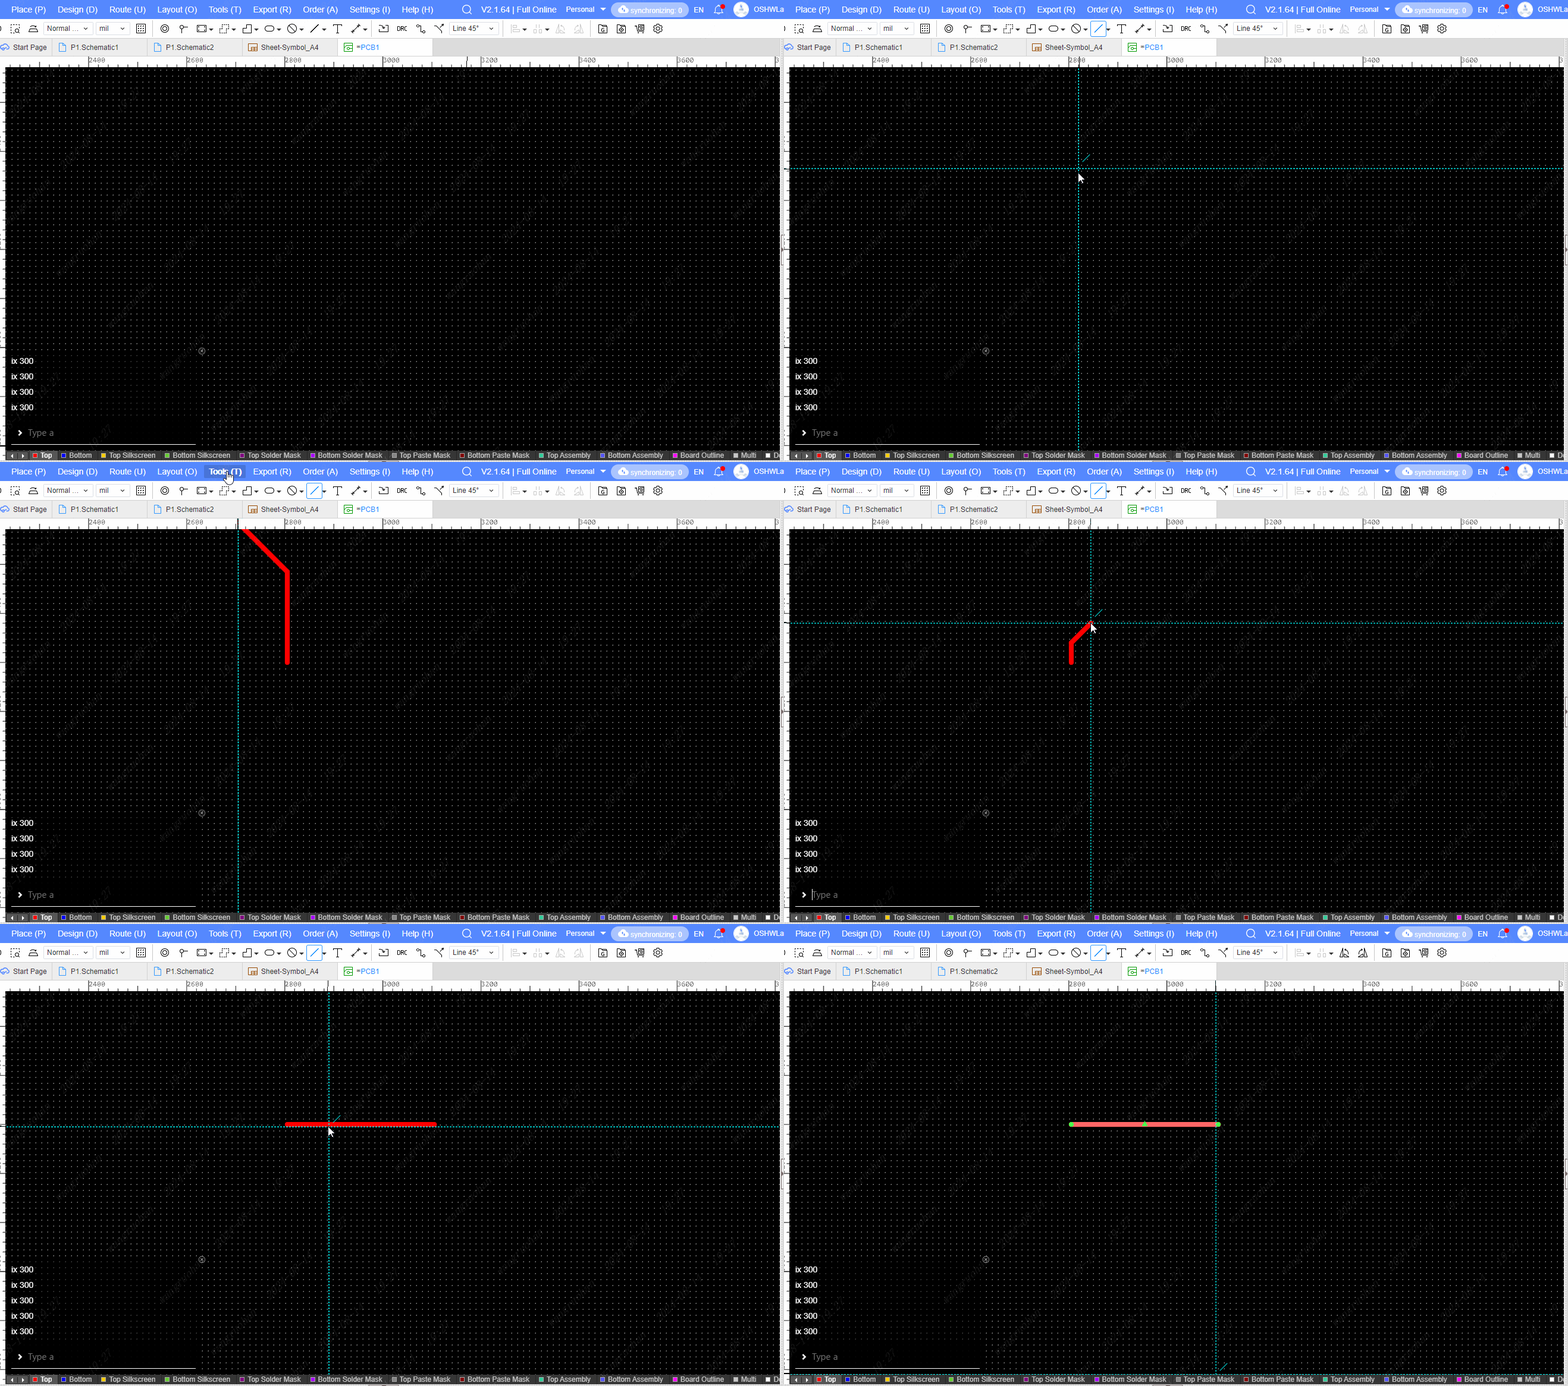 Y direction relative coordinate command
 iy <space> <y>
The operation mode of the relative coordinate command in the Y direction is the same as that of the relative coordinate command in the X direction.
Change layer command
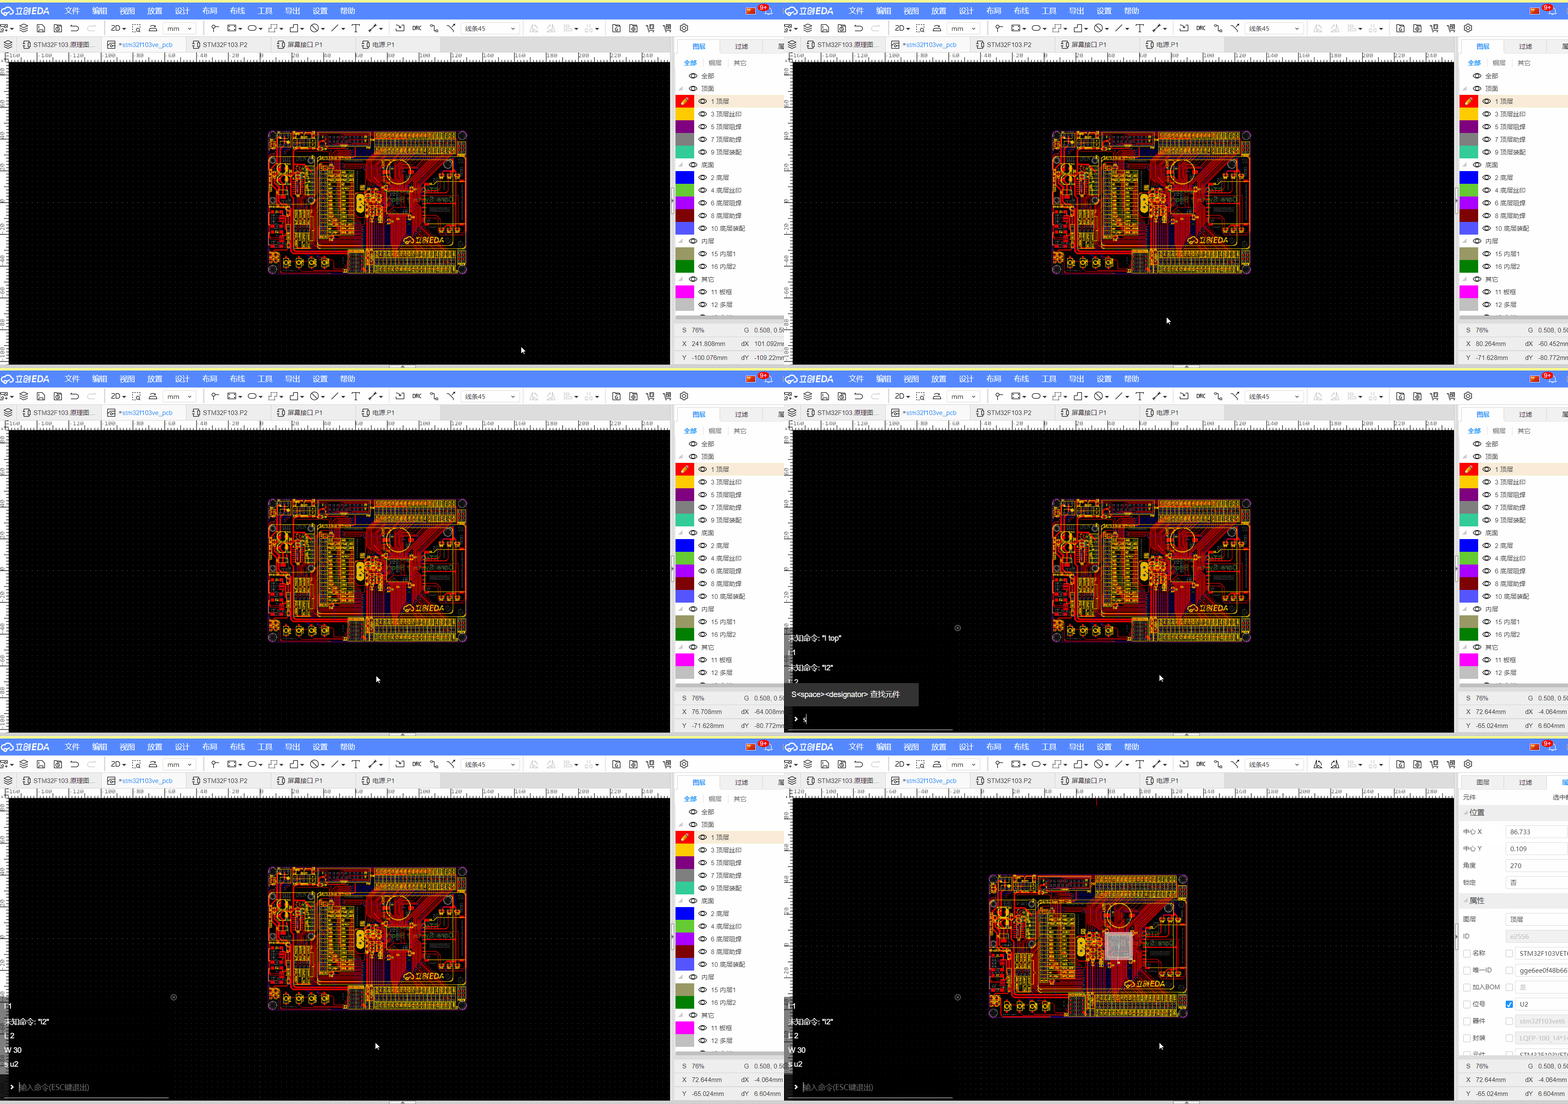
The shortcut key C brings up the command input box, enter "L 2" in the input box to switch to the bottom layer.
Enter "L 1" to switch to the top level;
Enter "L 2" to switch to the top level;
Enter "L 3" to switch to the top silk screen layer;
The number of the corresponding layer can be seen here in the property panel layer on the right.

find component command
The shortcut key C brings up the command input box, input "S plus the bit number of the device" to find the device in the editor and highlight it.
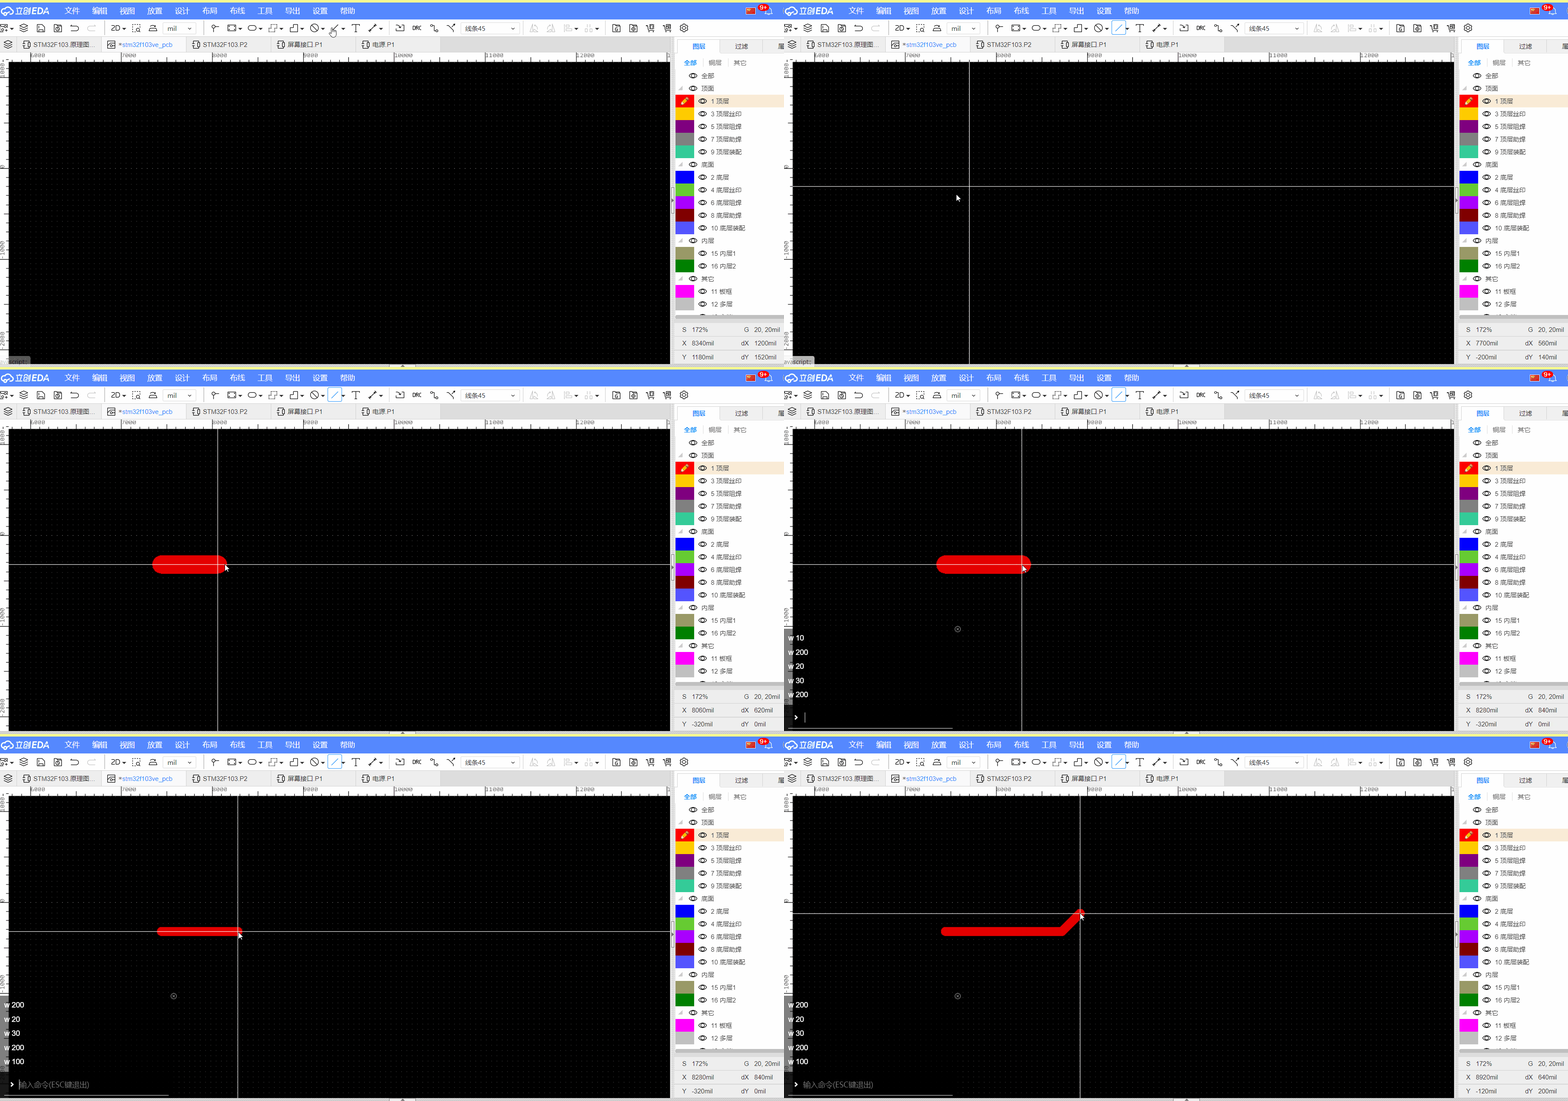
Modify line width
Click on the wire, and press the shortcut key C to call up the command input box, and input W to change the line width.
The search of the command is in the settings, the shortcut key setting query, or you can double-click to modify the command.
There are not many commands currently supported, and more commands will be introduced in the future.
