Create Device
The logical order of creating a device in EasyEDA Pro is: device = symbol + footprint + 3D model + properties
New Device
Top Menu - New - Device

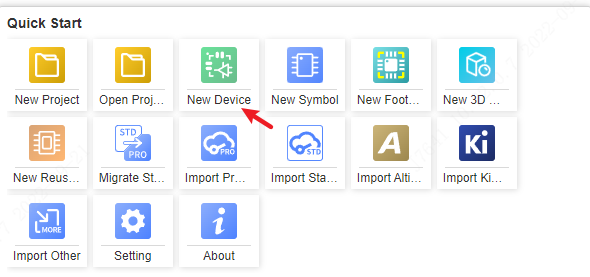
Start Page - Quick Start - New Device
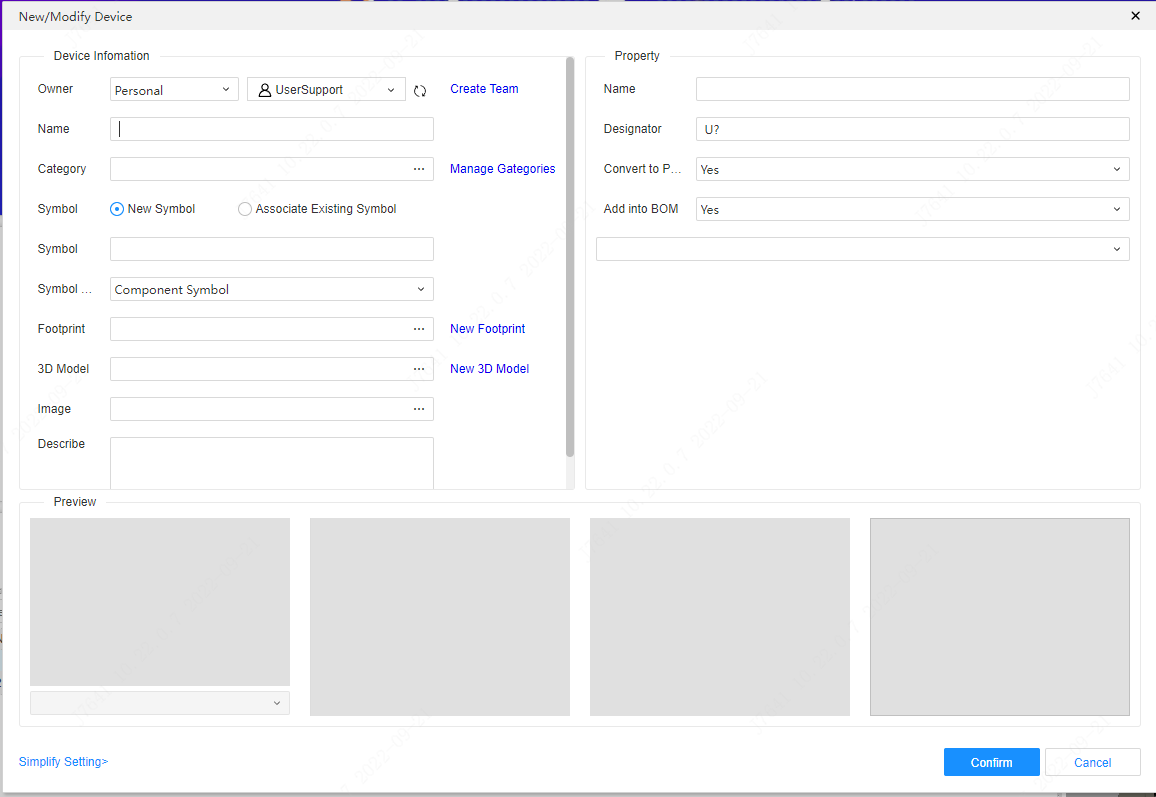
The new device dialog has two setting: Simplify and Complete Setting, you can use it as you want, and you can set it as default at Setting - System - General:
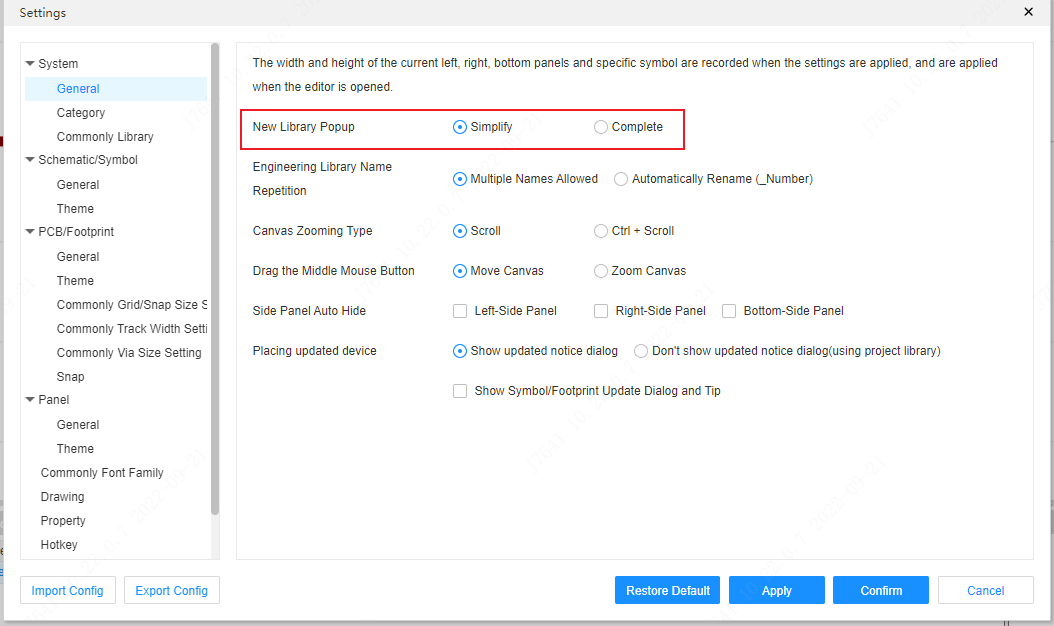
Simplify Setting Dialog
The simplify setting dialog just need to set some important properties.
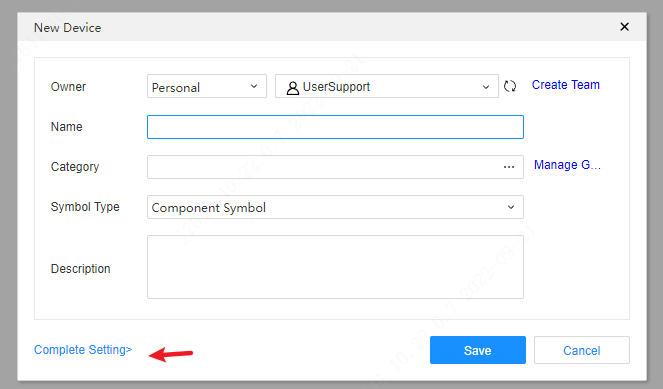
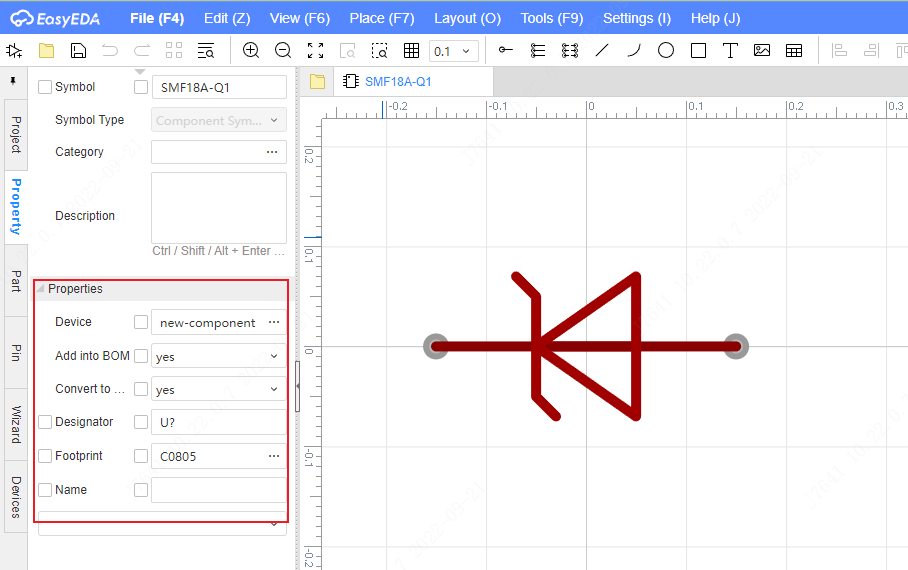
when you click save button, the editor will open a new symbol, you can draw the symbol directly, and set the device properties at left-side panel
when you finish, you can find your new device at bottom library panel, at the device list, you can right-click it and modify the device information

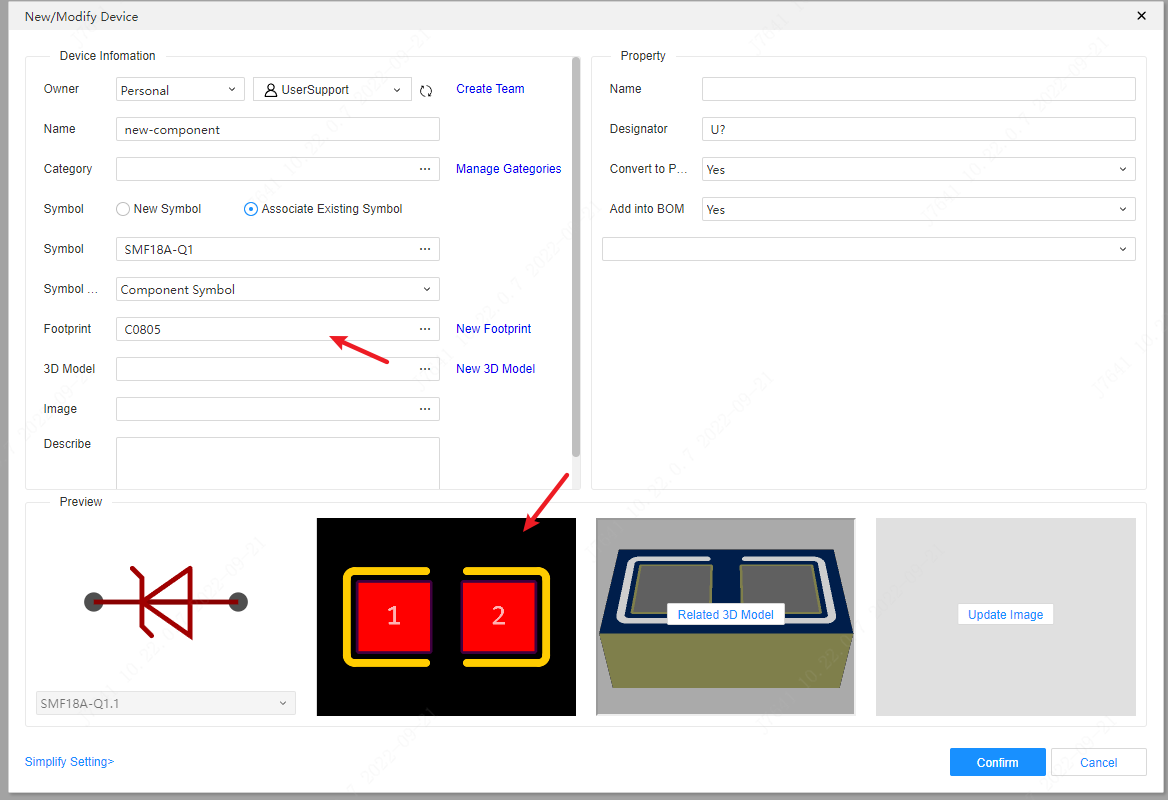
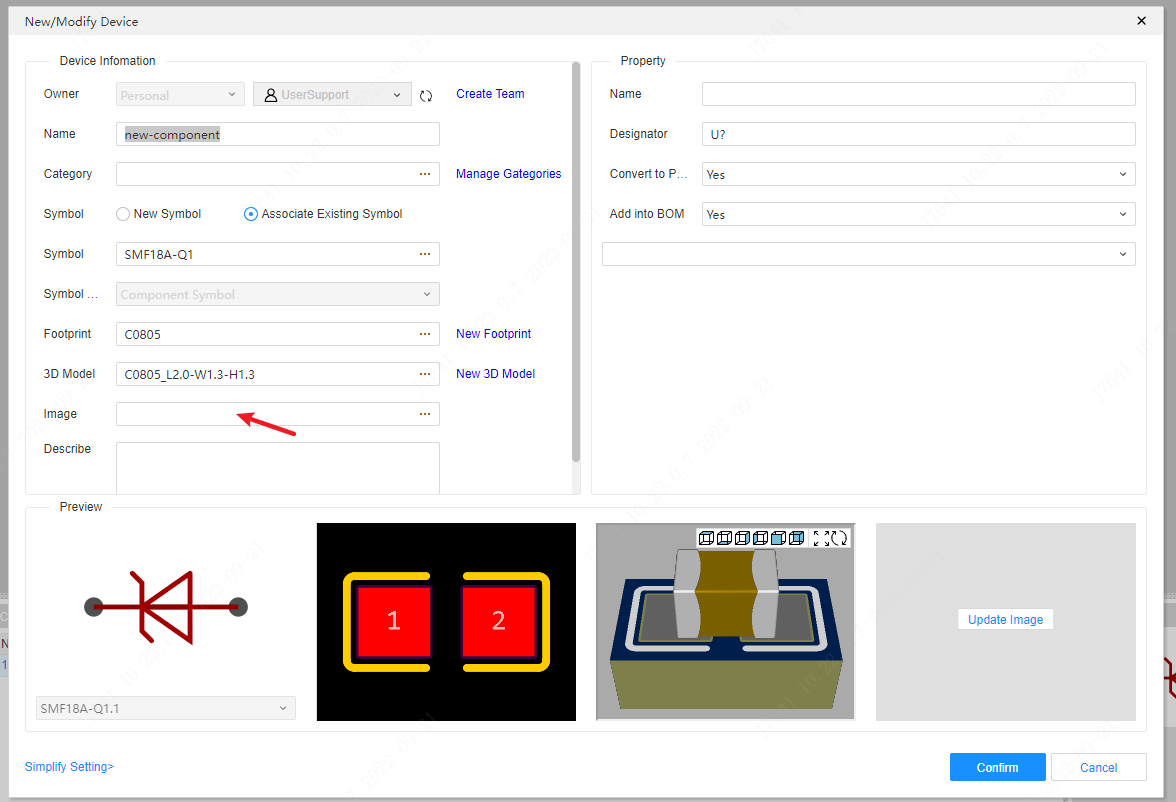
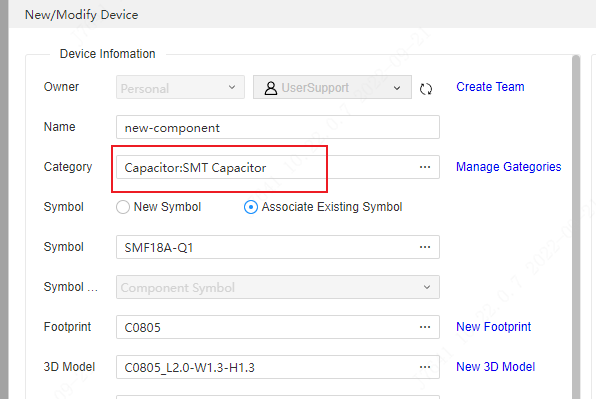
Complete Setting Dialog
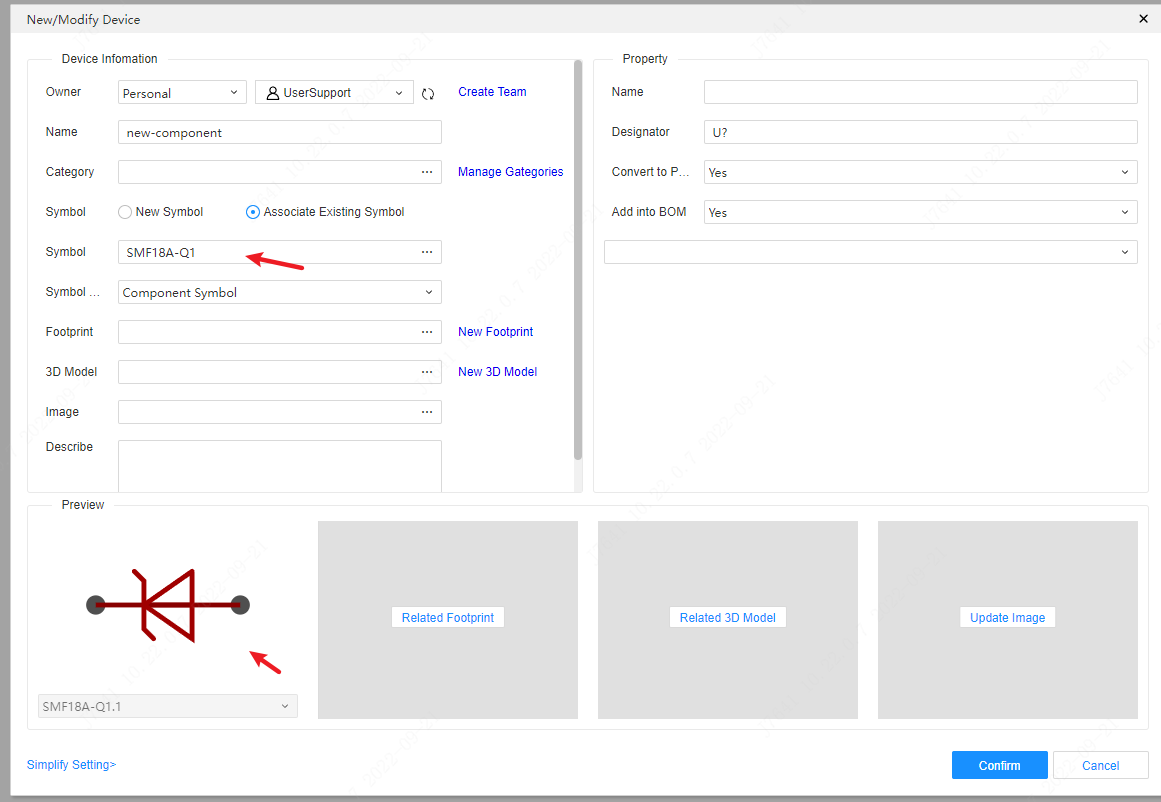
Click Create to pop up the device properties pop-up window, use the complete setting to fill in the name of the device and the team or individual to which the device belongs.
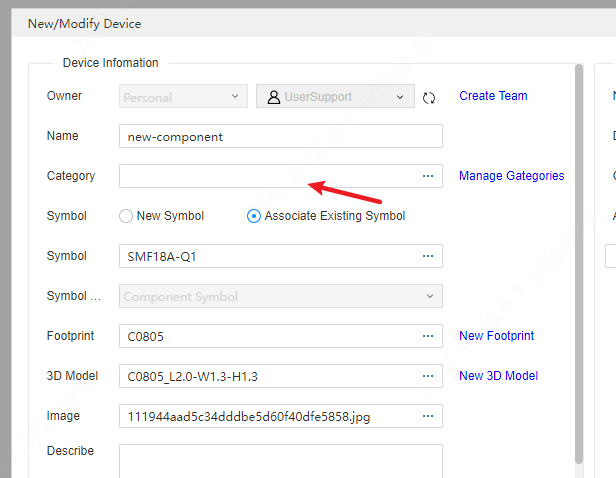
- Owner: The device is owned by the user or team.
- Name: The name of the device.
- Symbol: Click to bind the device.
- footprint: Click to bind the footprint to the device.
- 3D Model: Click to select the model bound to the device.
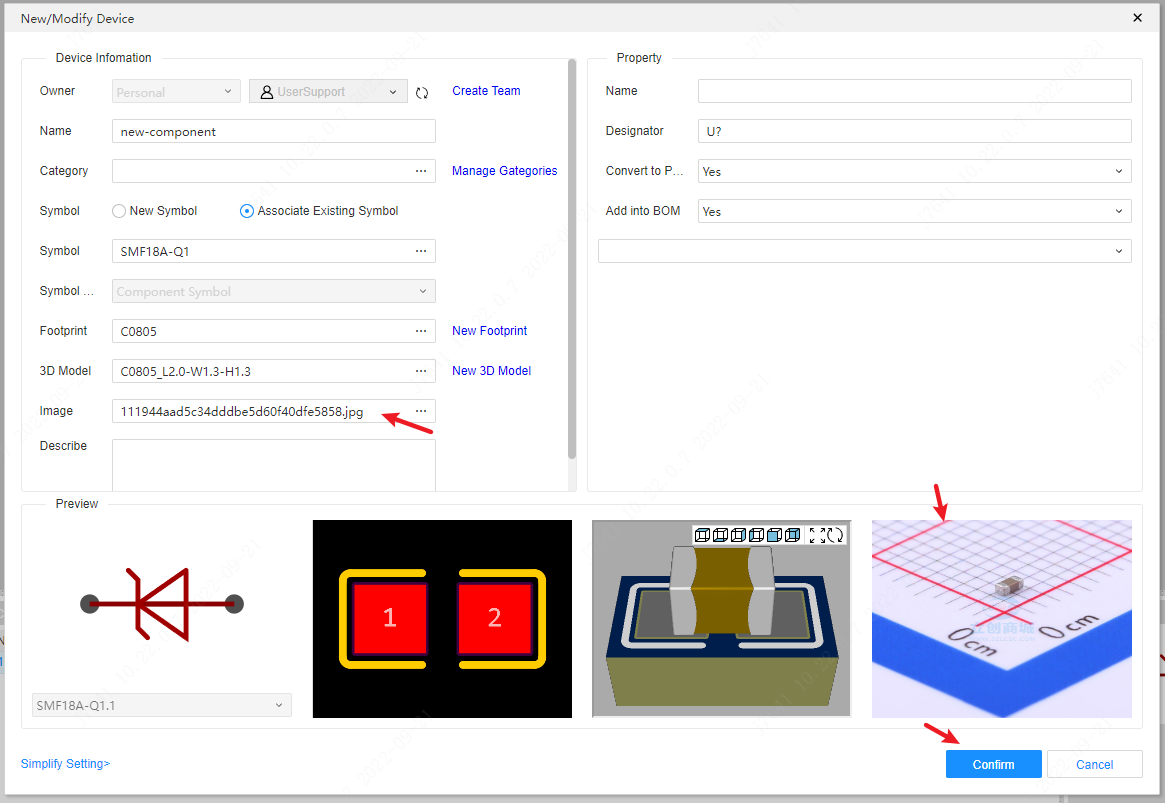
- Picture: Click to bind a real picture to the device.
- Catagory: Click to classify the currently bound device.
- Description: A description of the device.
Add Symbols
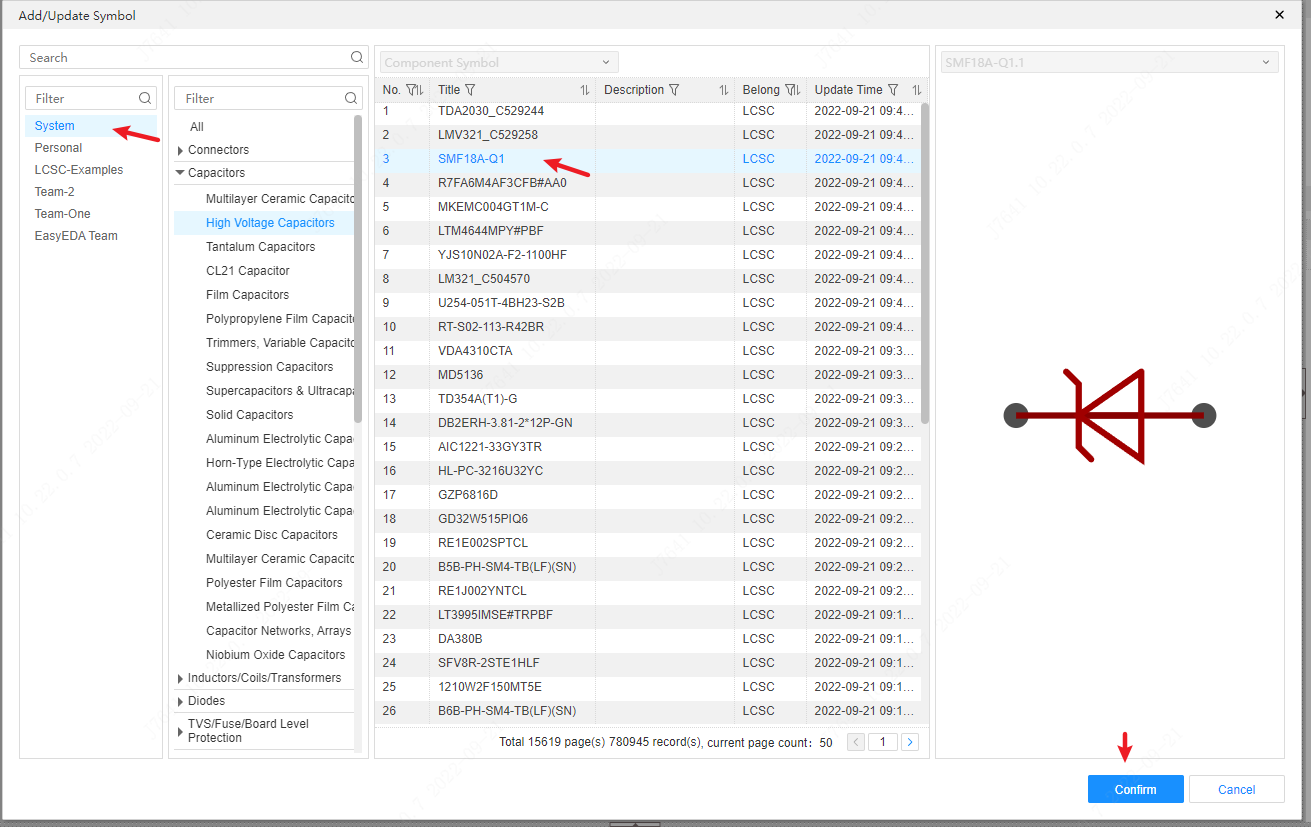
if you use the "Simple Setting" dialog, create the device will create the symbol automatically, if you use "Complete Setting", you can create or binding existed symbol.
Click the symbol's checkbox or the preview area below to add a symbol library to the device.

After clicking, a pop-up window will pop up, find the symbol of the device that needs to be bound, and click OK to complete the binding of the symbol.
Add footprint
Click the footprint check box or the footprint preview area.

After clicking, a pop-up window will pop up, where you can find the footprint library created by the user and the footprint library that comes with the system, find the corresponding footprint, and click Update to add it to the device library.
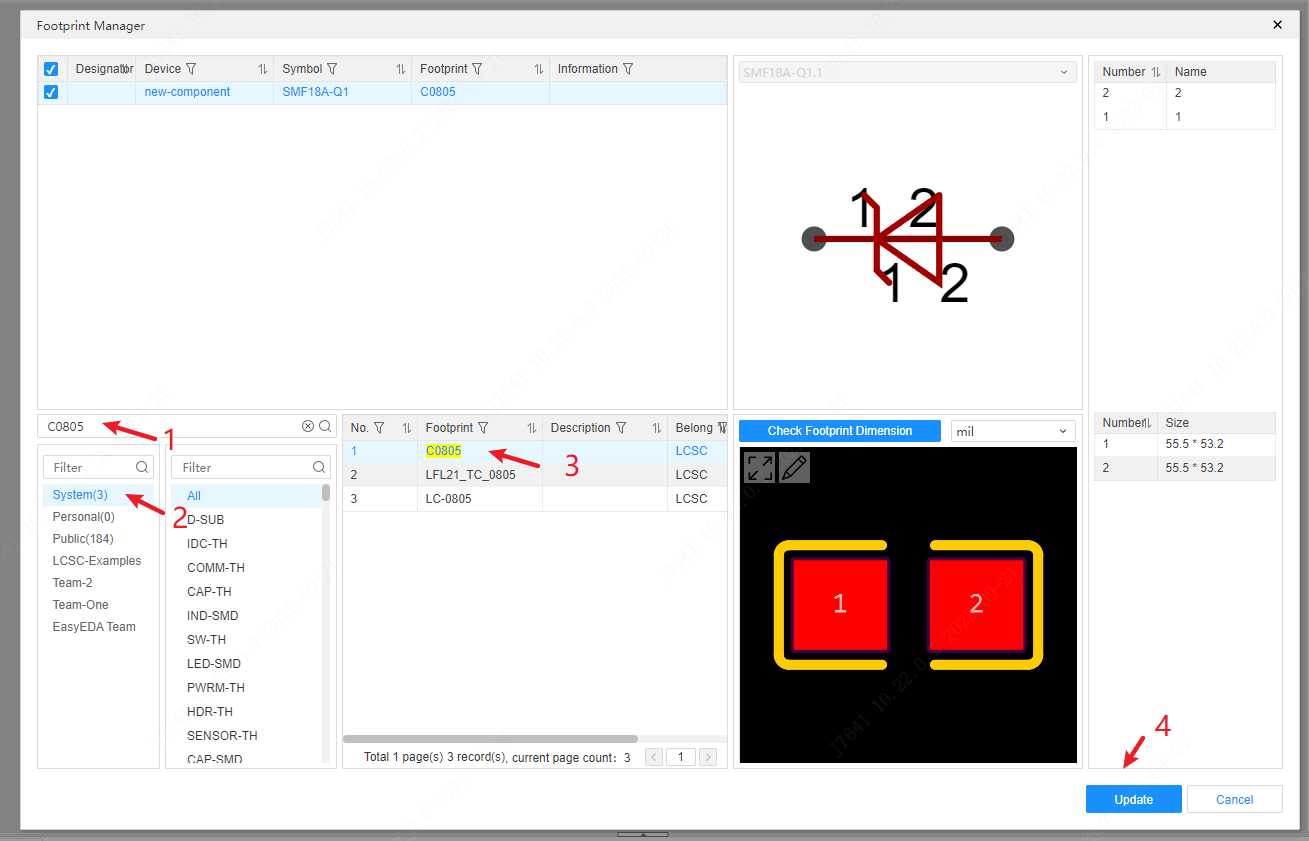
binding footprint:
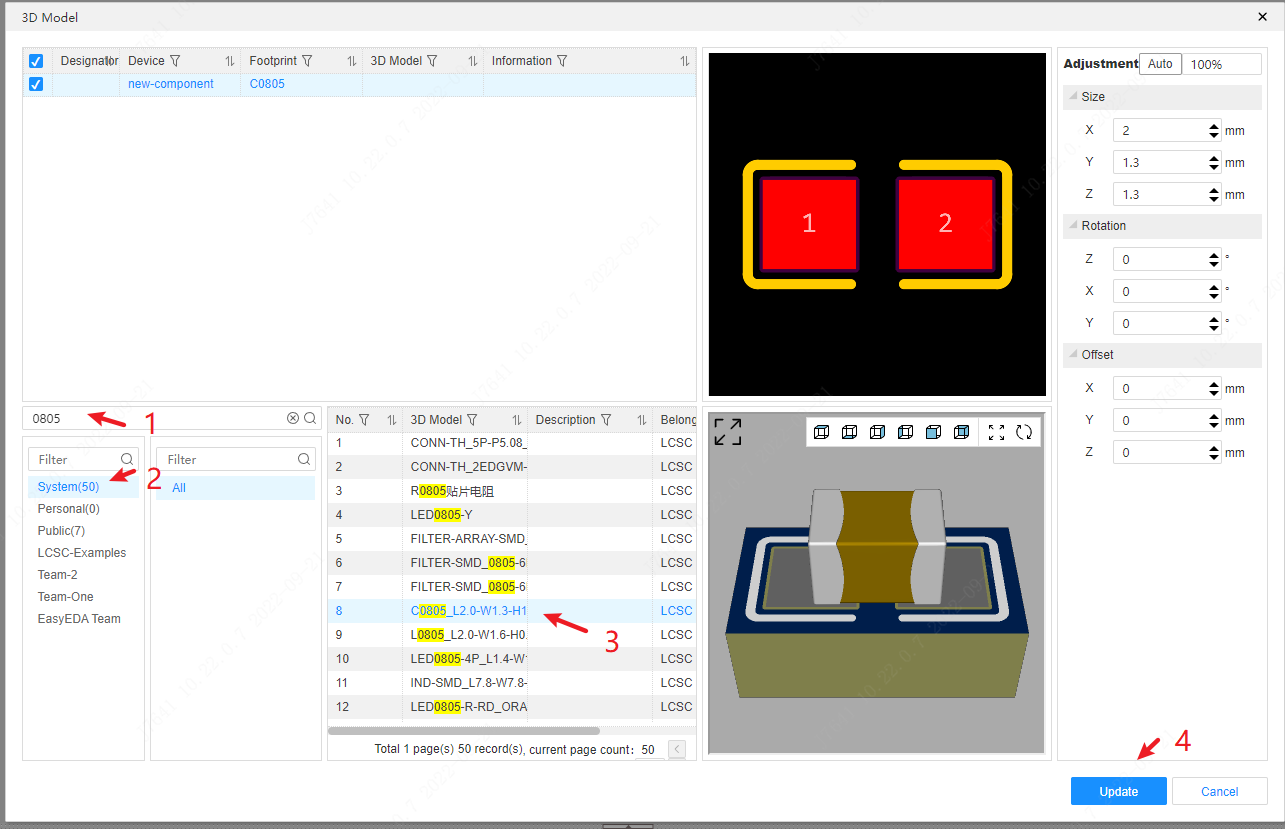
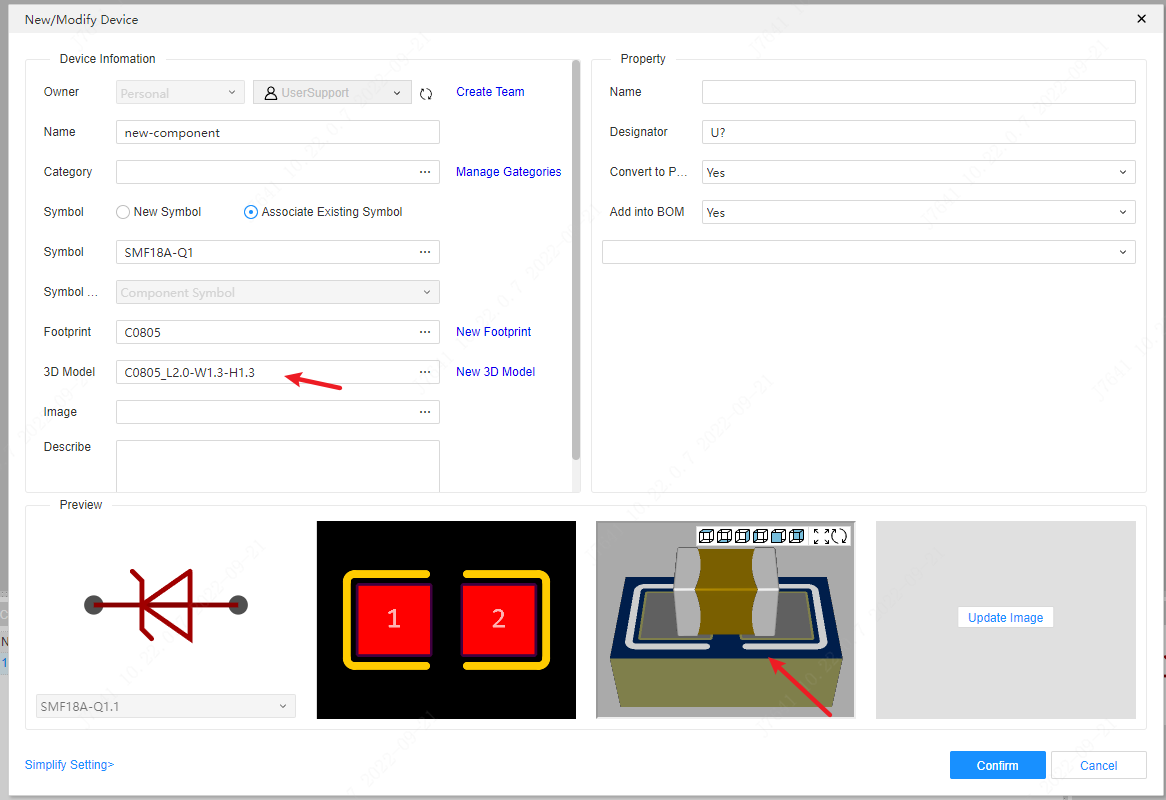
Add 3D Model
Click the 3D model check box or the 3D preview area,
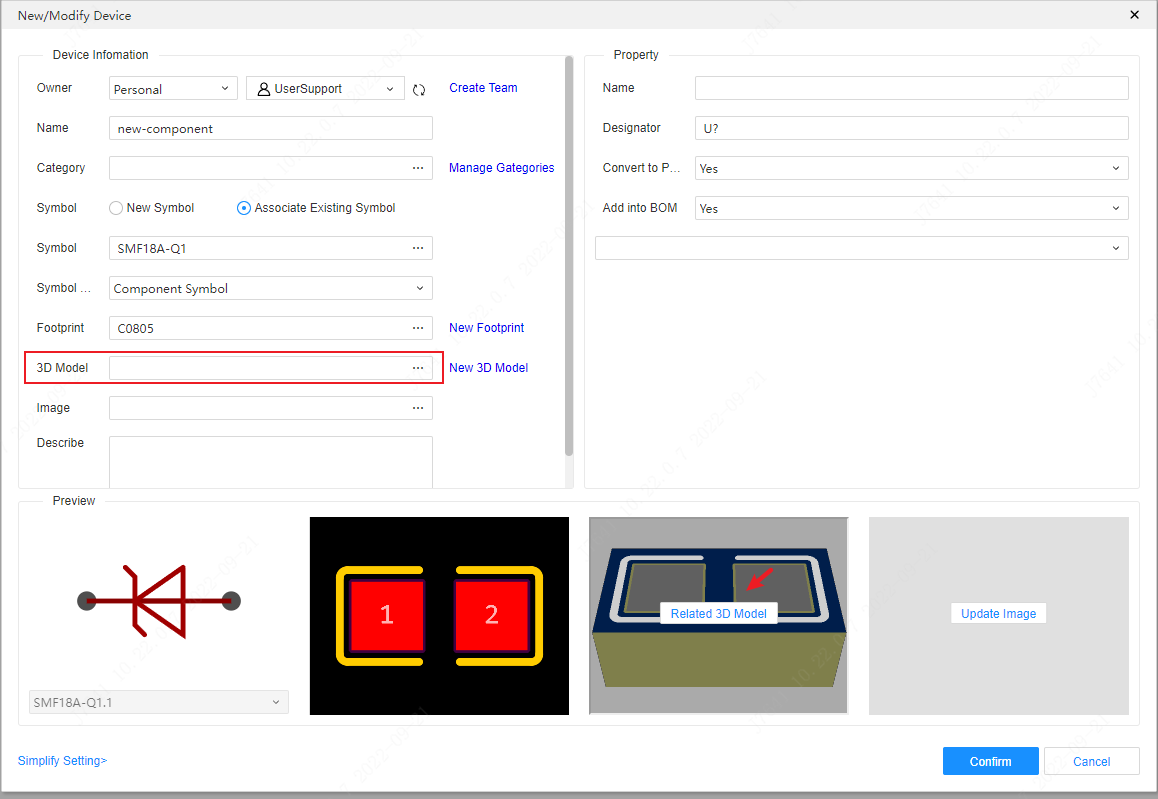
find the corresponding 3D model, adjust the position of the model and click Update to complete the addition of the 3D model.
Add Pictures
Click the image's checkbox or the image preview area.
After the pop-up window pops up, click "+" to select the picture to be added. Only files in picture format are supported, and picture links are not supported. 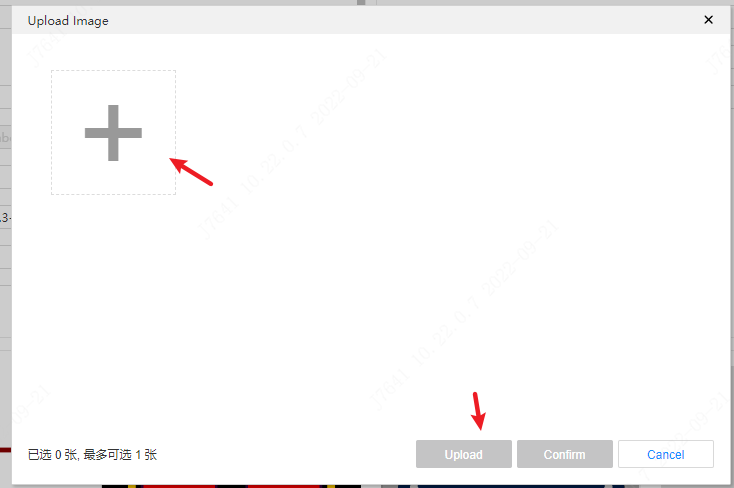
Add Category
The device is classified and set to facilitate management and maintenance.
Click the checkbox for the category
Select the corresponding attribute and click OK to add it to the corresponding category.

Added catagory:
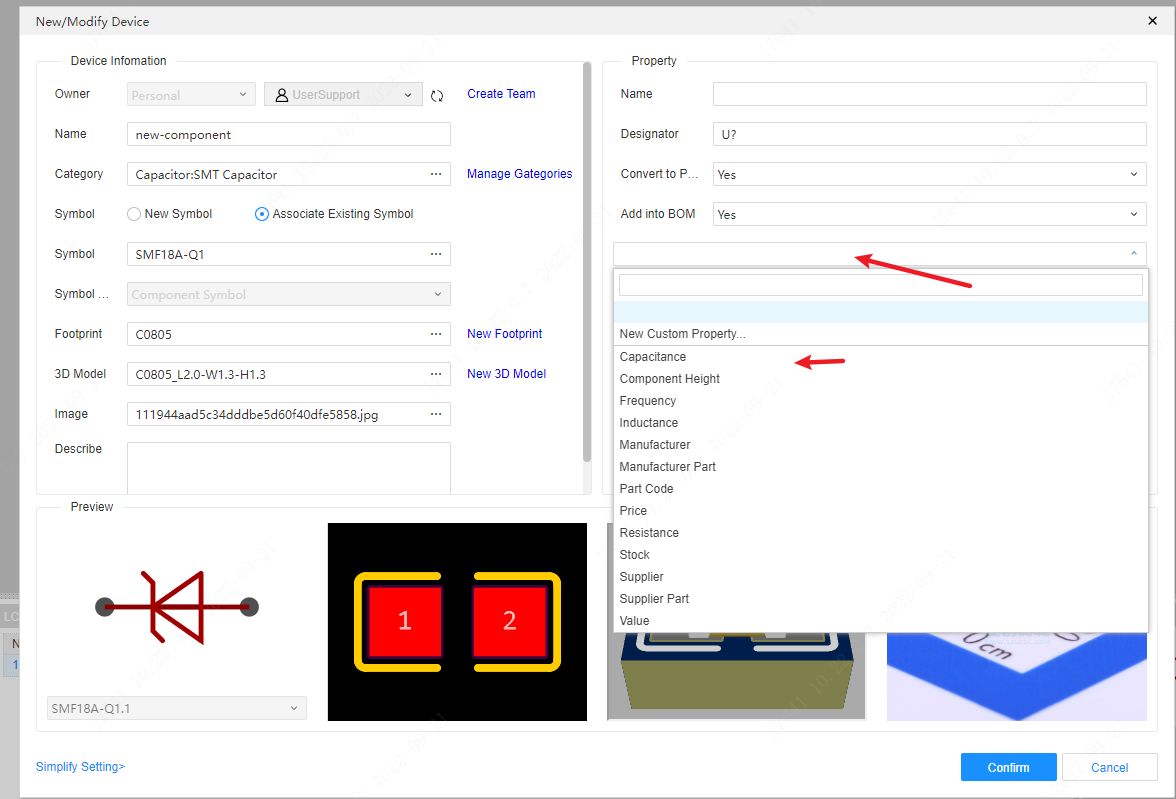
Add Properties
Add the properties of the device, select the properties to be added, and then add the device.
After adding symbols, footprints and corresponding properties, click OK to complete the creation of the device.
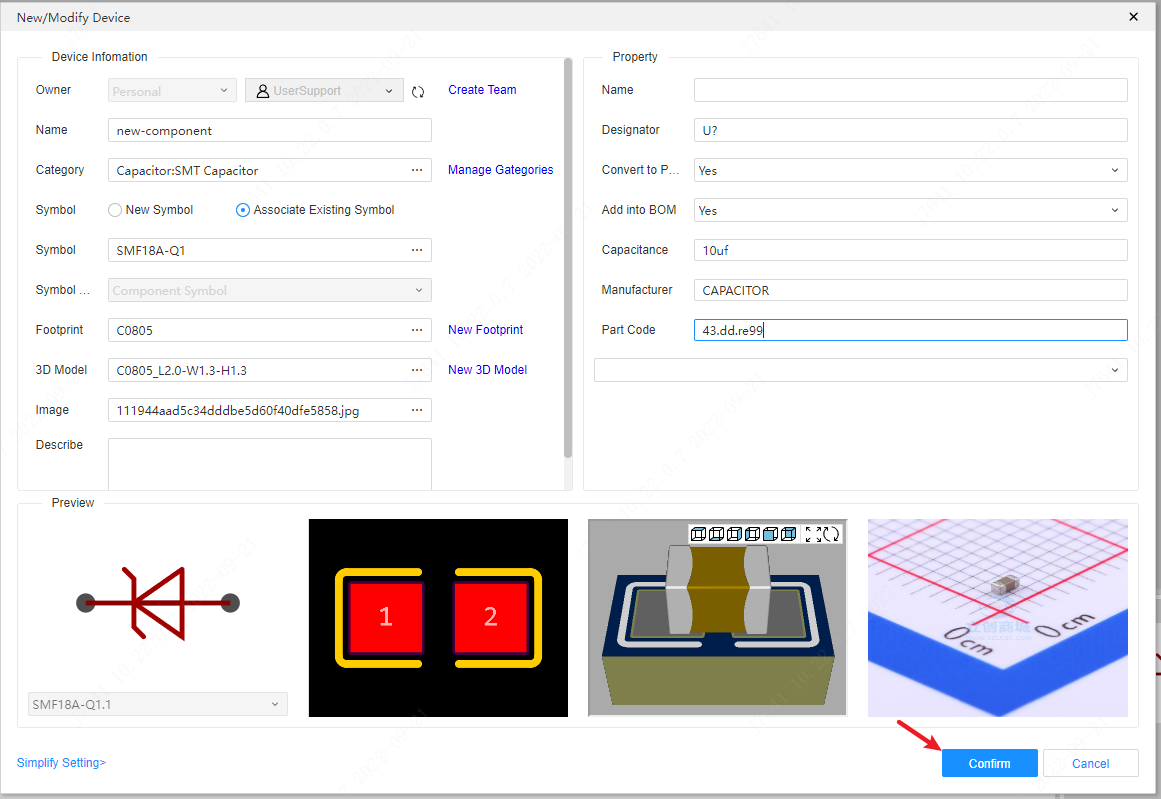
The created device can be viewed in the device library list in the bottom panel.
Create new devices in batches
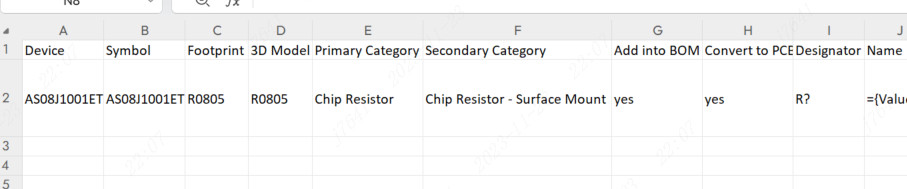
Supports batch creation of device libraries through an xlsx table. This function is very convenient for importing large batches of data.
Entrance: Top menu - File - New - Component, or start page - Quick Start - New Device, in the lower left corner of the New Device pop-up window, click Batch Create.

Instructions:
1.After opening the pop-up window for batch creation of devices, click the Export Template button to download the template.
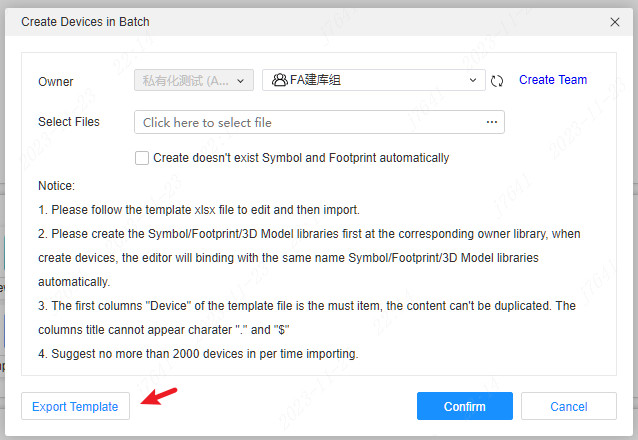
2.Open the exported template file xlsx, and add the corresponding device name, associated symbols, packages, 3D models, and other attribute parameters according to the examples inside.
3.After editing is completed, load the dialog box and select the owner to be imported. If your library owner has not created the symbol library and package library required for table association, you can check Automatically create non-existent symbols and packages, and a blank library with the same name will be automatically created to facilitate subsequent quick editing.
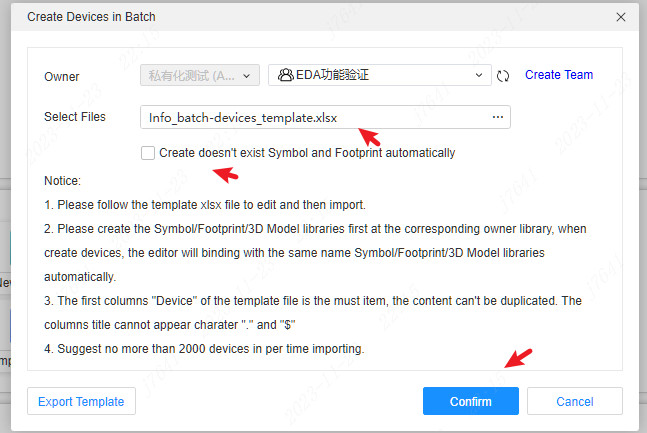
4.Click the Confirm button to automatically start batch creation of device libraries. After the creation is completed, you can find it in the library list at the bottom. Automatically created devices will automatically create non-existing classification names based on the first-level classification and second-level classification set in the table, and automatically associate the corresponding devices.
Notice:
- Please edit the form template file before importing it.
- Please create the symbol/package/3D model library in the corresponding owner library first. When creating devices in batches, they will be automatically associated and bound according to the symbol/package/3D model library name with the same name.
- The Device column of the template file is required, and duplicate content is not allowed. The characters "." and "$" cannot appear in the list header name.
- It is recommended to import no more than 2000 devices at a time.